
LazyVim - A beautiful neovim config for the lazy


LazyVim is a lightweight Neovim configuration that offers the sweet spot between a flexible configuration and a premade neovim distribution. LazyVim gives you a solid IDE development experience but also a flexible way to extend it and configure it to match your own needs.
Table of Contents
Getting started
The LazyVim documentation is a great way to get started with LazyVim:
If you enjoy a good video, @elijahmanor has a great introduction to LazyVim:
For the impatient reader, the TL;DR is that once installed LazyVim comes with:
- A initial configuration in you
.config/nvim/luafolder- A
configfolder with:- A
lazy.luafile that boostraps LazyVim - A
keymaps.luafile where you can add you custom key mappings - An
autocmd.luafile where you can add your custom auto commands - An
options.luafile where you can setup your custom neovim options
- A
- A
pluginsfolder where you can add new plugins or configure the built-in ones. Any file that you add under this directory will be loaded when you open Neovim. A suggestion is to create a file per plugin you want to add and configure. The folder starts with a single fileexample.luawhich contains a number of example configurations you can use.
- A
- A bare
.config/local/init.luafile that loads theconfigfolder - A number of plugins that get installed in you neovim data directory (referred in neovim’s documentation as
$XDG_DATA_HOME) which on unix systems is under~/local/shared/nvim.
Launcher
Two things I find really useful with the launcher are:
cto jump directly into your neovim configsto restore the previous session
Lazy.nvim
Under the hood, LazyVim relies on the lazy.nvim plugin manager to manage all plugins. It is useful to take some time to get a basic of understanding about what is lazy.nvim and how it works.
lazy.nvim is a modern neovim plugin manager with built-in UI and the ability of loading plugins and Lua modules lazily i.e. when they are needed. For plugins you can configure whether they are loaded based on events, commands, filetypes or key mappings. Modules are loaded when they are required.
In general, when using lazy.nvim plugins will be lazy-loaded when one of the following is true:
- The plugin only exists as a dependency in your spec
- It has an
event,cmd,ftorkeyskey config.defaults.lazy == true
Configuring plugins in lazy.nvim
The way in which lazy.nvim achieves laziness is by using declarative specs to configure plugins. Rather than actively requiring a plugin and configuring via a call to a setup function as it has become a de facto standard, lazy.nvim requires a fully declarative configuration (or spec).
For example, instead of installing telescope.nvim like when using packer or other plugin managers:
-- install plugin
use {
  'nvim-telescope/telescope.nvim', tag = '0.1.1',
-- or                            , branch = '0.1.x',
  requires = { {'nvim-lua/plenary.nvim'} }
}
-- setup plugin
require('telescope').setup{
  defaults = {
    -- default configs
  },
  pickers = {
    -- Default configuration for builtin pickers goes here:
  },
  extensions = {
    -- Your extension configuration goes here:
  }
}
-- Setup mappings
local builtin = require('telescope.builtin')
vim.keymap.set('n', '<leader>ff', builtin.find_files, {})
vim.keymap.set('n', '<leader>fb', builtin.buffers, {})
You write a declarative spec in the form of a Lua table:
{
  "nvim-telescope/telescope.nvim",
  cmd = "Telescope",
  version = '0.1.1', -- telescope did only one release, so use HEAD for now
  keys = {
    { "<leader>fb", "<cmd>Telescope buffers<cr>", desc = "Buffers" },
    { "<leader>ff", "<cmd>Telescope find_files<cr>", desc = "Find Files" },
  },
  opts = {
    -- this is the same opts one passes to the setup() function
    defaults = {
      -- default configs
    },
    pickers = {},
    extensions = {},
  },
}
When you load neovim, the telescope plugin won’t be immediately loaded. But as soon as you type any of the keys defined in the lazy.nvim spec, telescope will be loaded and executed.
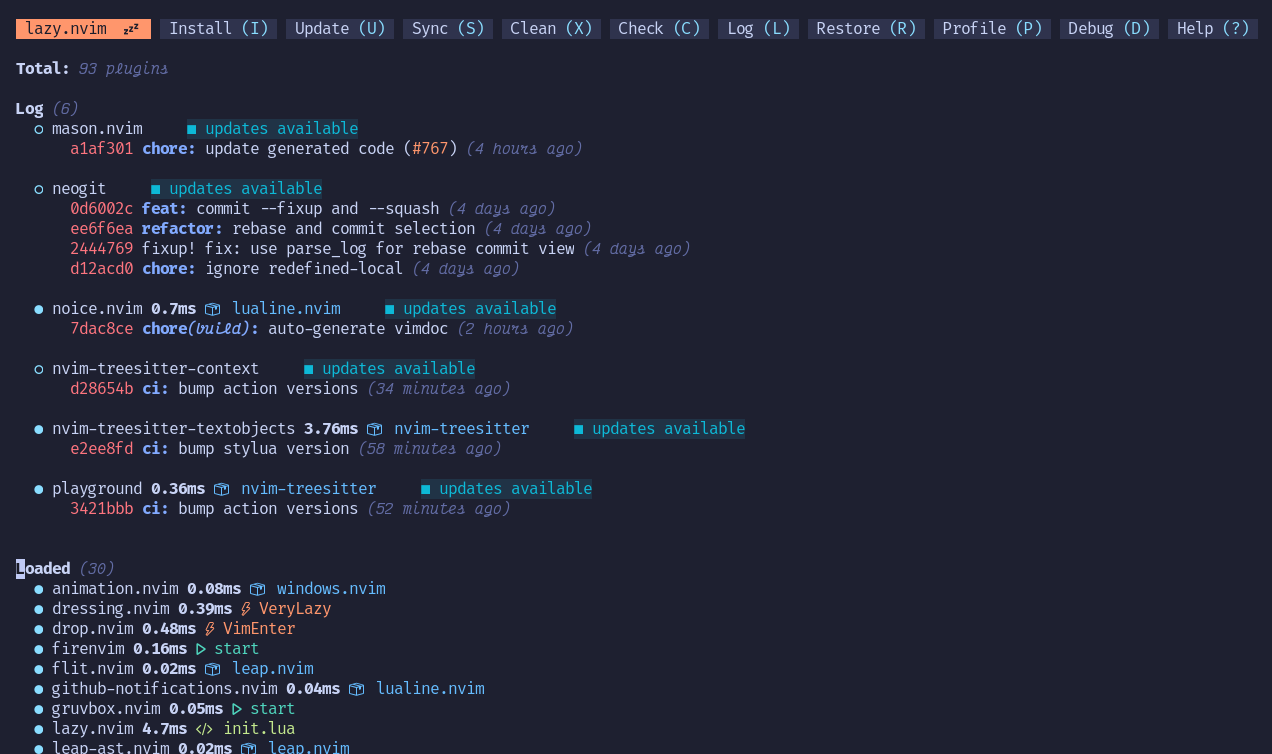
Lazy.nvim UI
A really convenient feature of lazy.nvim is its UI. Type <leader>l and you get access to a simple, yet very comprehensive UI where you can install, update, debug, profile, uninstall and see the latest feature of your favorite plugins. (Tip: Type ? inside the lazy.nvim UI to get help about how to use it)
Other lazy.nvim features
- Fast startup times thanks to automatic caching and bytecode compilation of Lua modules
- Automatically install missing plugins before starting up Neovim, allowing you to start using it right away
- Async execution for improved performance
- No need to manually compile plugins
- Generates helptags of the headings in README.md files for plugins that don’t have vimdocs
- Dev options and patterns for using local plugins
- Profiling tools to optimize performance
- Lockfile lazy-lock.json to keep track of installed plugins
- Automatically check for updates
- Commit, branch, tag, version, and full Semver support
- Statusline component to see the number of pending updates
- Automatically lazy-loads colorschemes
Installation
To install lazy.nvim outside of LazyVim take a look at the docs.
Learning key mappings
Getting started with LazyVim (as a newcomer to neovim or as a seasoned vim user) can be quite the learning curve with all the plugins and built-in mappings. Luckily for us, LazyVim comes with a couple of plugins that make it really easy to discover new mappings for how to interact with different features: which-key and telescope.
which-key is a neovim plugin that displays a popup with possible key bindings for the command that you have started typing. So if you aren’t quite sure about a given mapping, you can start by typing the <leader> key and then see the popup with suggestions for new keys you can type:

But if you have no idea what to type, you can try your luck by using the :Telescope keymaps picker, also available through <leader>sk for “Search Keys”. Let’s say that we want to learn whether there are any mappings for closing notifications. So we open the telescope picker and type notification which will show the <leader>un mapping to “delete all notifications”.
Finally, you can always take a look at the LazyVim documentation (which has lots of relevant mappings).
Interacting with notifications
Notifications can be a bit annoying at times, specially when they hide source code. You can type <leader>un to delete all notifications.
Lazyvim core plugins
TBD
Custom configurations
Mappings
There are some mappings that I can’t just quite live without after years and years of using vim and neovim. Lucky for me, LazyVim provides a config/keymaps.lua where one can place their custom mappings:
-- Keymaps are automatically loaded on the VeryLazy event
-- Default keymaps that are always set: https://github.com/LazyVim/LazyVim/blob/main/lua/lazyvim/config/keymaps.lua
-- Add any additional keymaps here
-- exit insert mode with jk
vim.keymap.set("i", "jk", "<ESC>", { noremap = true, silent = true, desc = "<ESC>" })

-- Perusing code faster with K and J
vim.keymap.set({ "n", "v" }, "K", "5k", { noremap = true, desc = "Up faster" })
vim.keymap.set({ "n", "v" }, "J", "5j", { noremap = true, desc = "Down faster" })

-- Remap K and J
vim.keymap.set({ "n", "v" }, "<leader>k", "K", { noremap = true, desc = "Keyword" })
vim.keymap.set({ "n", "v" }, "<leader>j", "J", { noremap = true, desc = "Join lines" })

-- C-P classic
vim.keymap.set("n", "<C-P>", "<leader>ff")

-- Save file
vim.keymap.set("n", "<leader>w", "<cmd>w<cr>", { noremap = true, desc = "Save window" })

-- Unmap mappings used by tmux plugin
-- TODO(vintharas): There's likely a better way to do this.
vim.keymap.del("n", "<C-h>")
vim.keymap.del("n", "<C-j>")
vim.keymap.del("n", "<C-k>")
vim.keymap.del("n", "<C-l>")
vim.keymap.set("n", "<C-h>", "<cmd>TmuxNavigateLeft<cr>")
vim.keymap.set("n", "<C-j>", "<cmd>TmuxNavigateDown<cr>")
vim.keymap.set("n", "<C-k>", "<cmd>TmuxNavigateUp<cr>")
vim.keymap.set("n", "<C-l>", "<cmd>TmuxNavigateRight<cr>")
Custom nvim-cmp configs
In addition to these mappings I customize nvim-cmp so that I can autocomplete on <TAB>, both for triggering completion but also for selecting items (or jumping between fields of a snippet). The way that one configures nvim-cmp and other plugins within the LazyVim distribution is a bit exoteric for me:
-- nvim-cmp configs
return {
  -- customize nvim-cmp configs
  -- Use <tab> for completion and snippets (supertab)
  -- first: disable default <tab> and <s-tab> behavior in LuaSnip
  {
    "L3MON4D3/LuaSnip",
    keys = function()
      return {}
    end,
  },
  -- then: setup supertab in cmp
  {
    "hrsh7th/nvim-cmp",
    dependencies = {
      "hrsh7th/cmp-emoji",
    },
    ---@param opts cmp.ConfigSchema
    opts = function(_, opts)
      local has_words_before = function()
        unpack = unpack or table.unpack
        local line, col = unpack(vim.api.nvim_win_get_cursor(0))
        return col ~= 0 and vim.api.nvim_buf_get_lines(0, line - 1, line, true)[1]:sub(col, col):match("%s") == nil
      end

      local luasnip = require("luasnip")
      local cmp = require("cmp")

      -- This is reaaaally not easy to setup :D
      opts.mapping = vim.tbl_extend("force", opts.mapping, {
        ["<Tab>"] = cmp.mapping(function(fallback)
          -- If it's a snippet then jump between fields
          if luasnip.expand_or_jumpable() then
            luasnip.expand_or_jump()
          -- otherwise if the completion pop is visible then complete
          elseif cmp.visible() then
            cmp.confirm({ select = false })
          -- if the popup is not visible then open the popup
          elseif has_words_before() then
            cmp.complete()
          -- otherwise fallback
          else
            fallback()
          end
        end, { "i", "s" }),
        ["<S-Tab>"] = cmp.mapping(function(fallback)
          if cmp.visible() then
            cmp.select_prev_item()
          elseif luasnip.jumpable(-1) then
            luasnip.jump(-1)
          else
            fallback()
          end
        end, { "i", "s" }),
      })
    end,
  },
}
Custom telescope configs
I customize telescope so that I can enable the fzf sorter and have some mappings I’ve grown accustomed to from using fzf in an early incarnation:
return {
  {
    "nvim-telescope/telescope.nvim",
    -- install fzf native
    dependencies = {
      "nvim-telescope/telescope-fzf-native.nvim",
      build = "make",
      config = function()
        require("telescope").load_extension("fzf")
      end,
    },
    keys = {
      -- change a keymap
      { "<C-p>", "<cmd>Telescope find_files<CR>", desc = "Find Files" },
      -- add a keymap to browse plugin files
      {
        "<leader>fp",
        function()
          require("telescope.builtin").find_files({ cwd = require("lazy.core.config").options.root })
        end,
        desc = "Find Plugin File",
      },
      -- This is using b because it used to be fzf's :Buffers
      {
        "<leader>b",
        "<cmd>Telescope oldfiles<cr>",
        desc = "Recent",
      },
    },
  },
}
Additional plugins
So far I’ve been installing these additional plugins:
-- Highlight YAML front matter
vim.api.nvim_set_var("vim_markdown_frontmatter ", 1)

return {
  -- tmux vim
  { "christoomey/vim-tmux-navigator" },

  -- markdown support
  { "godlygeek/tabular" }, -- required by vim-markdown
  { "plasticboy/vim-markdown" },
}
Additional configuration tips
The LazyVim docs have a number of tips and recipes with additional information about how to use and enhance your LazyVim and neovim experience. Some of my favorite:
- Moving around files
- LazyVim uses bufferline to arrange buffers in tab-like looking manner and provide some nice visual cues about whether files are active and/or have been modified in some way. In addition to UI changes, bufferline also adds a number of mappings to quickly jump between buffers. You can use
HandLto jump to open buffers that appear in the buffer line,Hto jump to the left ones andLto jump to the ones on the right. - Use telescope to jump between other files:
- If you want to fuzzy search over open buffers, use
<leader>, - To fuzzy search over any file, use
<leader><space>
- If you want to fuzzy search over open buffers, use
- LazyVim uses bufferline to arrange buffers in tab-like looking manner and provide some nice visual cues about whether files are active and/or have been modified in some way. In addition to UI changes, bufferline also adds a number of mappings to quickly jump between buffers. You can use
- Operations with buffers
<leader>bbto switch to other buffer<leader>bdto delete buffers you no longer need<leader>bpto toggle pinning a buffer<leader>bPto delete non pinned buffers
- Jump to definition in file
- Use
<leader>ssto Go to symbol which opens a fuzzy search for all symbols in the file using telescope <C-o>,<C-i>andgdto navigate the code
- Use
Extras
Lazyvim comes with a number of extras that you can opt into through the :LazyExtras command.
In addition to the above, support for diverse programming languages is now handled via lang extras also controlled via the :LazyExtras command.
Markdown
You can install support for markdown in LazyVim as an extra via :LazyExtras like with many other languages. It provides a number of useful features both for authoring and reading markdown files. It currently relies on the mardownlint-cli2 library for linting which requires a configuration that can be provided as a .markdownlint.yaml file following this schema.
Copilot
Installing copilot with lazyvim is truly a breeze. Enable it via the :LazyExtras command and you’re set. The next time you open neovim you’ll be prompted to sign in into your copilot account.
You may want to update your copilot configuration adding a copilot.lua file in your config/plugins folder:
-- ~/.config/nvim/lua/plugins/copilot.lua
-- copilot configuration
return {
  "zbirenbaum/copilot.lua",
  opts = {
    -- These are disabled in the default configuration.
    suggestion = { enabled = true },
    panel = { enabled = true },
  },
}
-- For additional configurations for the copilot panel, suggestions, filetypes supported, etc
-- see https://github.com/zbirenbaum/copilot.lua
Lazyvim copilot’s support comes from two plugins:
- zbirenbaum/copilot.lua, a copilot client for neovim written in lua
- zbirenbaum/copilot-cmp which adds a copilot source to nvim-cmp.
And it adds a copilot icon to lualine which tells you when copilot is available and running (alternatively you can run the :Copilot command).
For additional configurations for the copilot panel, suggestions, filetypes supported, etc, take a look at the zbirenbaum/copilot.lua docs.
Full neovim config
For more information you can find my full neovim lazyvim config on GitHub.
Written by Jaime González García , dad, husband, software engineer, ux designer, amateur pixel artist, tinkerer and master of the arcane arts. You can also find him on Twitter jabbering about random stuff.